 Industry InsightsHow to Set Diameter and Weld Quality on a Ring Making & Butt-Welding Combo MachineAn integrated ring-making and resistance butt-we…

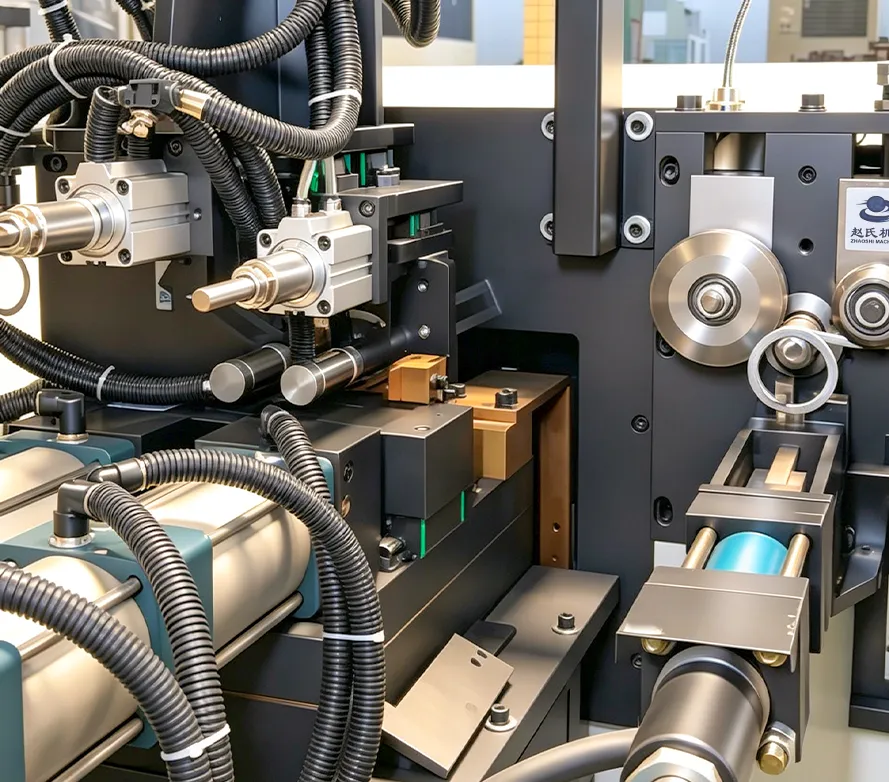
How to Adjust Ring Diameter on a Flat-Bar Flange Ring Former
Industry Insights
Author:
leaf
Time:
3 月 12, 2026
Seasoned flange makers know a flat-bar flange ring former is simple in principle—but dialing in a stable, accurate ring diameter takes feel and experience. On older non-CNC machines especially, ring size depends entirely on manually adjusting the pressure rollers and cutter position. This article organizes years of setup experience into a clear sequence: from rollers to cut-off, exactly how to adjust ring diameter.

1. Core Logic: Rollers Set Curvature; the Cutter Sets When to Cut
Before the hands-on steps, understand how ring diameter is controlled.
Flat bar enters the forming zone through the feed rollers and passes several pressure rollers (also called forming or adjusting rollers). Their position sets the bend radius—tighter and closer rollers make a sharper curve and a smaller ring; looser, farther rollers make a gentler curve and a larger ring.
Cutter position sets when the bar is cut. Closer to the forming zone, the ring is smaller (cut before enough bend builds); farther away, more feed and bend continue, so the ring grows. Adjusting diameter therefore means adjusting two things: roller in/out position and cutter near/far position.
2. Step One: Set the Rollers First (Curvature)
There are usually two or three pressure rollers, some on the face and some on the side. Setup steps:
Loosen the lock nuts: find the roller adjustment handle or screw and release the lock nuts first.
Rough-set roller position: turn the handle to advance the rollers. For a smaller ring, screw the rollers inward so the bar bends more sharply; for a larger ring, back them out so the curve is gentler.
Trial-bend for curvature: hand-feed a length of flat bar (do not enable auto cut-off) and watch only the resulting arc. You are not aiming for a finished part yet—judge the trend: enough curve? Too tight or too straight?
Fine-tune until the arc looks right: keep adjusting the rollers until that curvature, once cut, should match the target diameter.
Note: Adjust rollers as a set, not one alone. Some machines pair upper/lower rollers; others run front/rear. Keep loading even so the bar does not twist.
3. Step Two: Set the Cutter (Length)
With curvature dialed in, set cutter position—the point at which the bent bar is cut.
Find the cutter limit: on hydraulic ring formers the cutter is usually controlled by a travel switch or mechanical stop that can move forward and back.
Rough-set the stop: loosen the stop screws and move it toward the forming rollers (smaller ring) or farther away (larger ring).
Trial-cut one finished ring: run one automatic cycle of feed, bend, and cut.
Measure actual diameter: use a tape or calipers and compare with the target.
Iterate: if the ring is too large, move the stop closer to the forming rollers (cut earlier); if too small, move it farther (cut later). Adjust, cut one, and repeat until it is on size.
4. Roller–Cutter Rule: Curvature First, Length Second
A common beginner mistake is adjusting the cutter first. With curvature wrong, rings come out oval or bent on one side and straight on the other.
Remember the order: set rollers for accurate curvature, then lock length with the cutter.
Wrong curvature cannot be fixed by cutter position alone; once curvature is right, the cutter only chooses the cut point.
5. Common Issues in Real Setup
1. Diameter jumps large and small: usually not a setup math problem but feed slip or loose rollers. Check feed-roller wear, wire-press cylinder pressure, and whether roller lock nuts are tight.
2. Ring is oval, not round: uneven curvature, or the cut is too early/late. Fine-tune rollers so the arc is stable before the cut zone. Also check cutter sharpness—a dull blade can pull and distort at cut-off.
3. Cannot get a small enough ring; always oversized: roller travel may be maxed out while bend is still insufficient. Check severe roller wear—worn rollers lose grip and cannot bend hard enough. A new roller often solves it.
4. Diameter shifts after a new batch of flat bar: hardness and thickness vary by batch, so springback changes. That is normal—re-trim roller position for the new material to compensate springback.
Related articles
View allIndustry InsightsHow to Set Diameter and Weld Quality on a Ring Making & Butt-Welding Combo MachineAn integrated ring-making and resistance butt-we…Industry InsightsHow to Straighten Wire Fast on a CNC Wire Bender: Shop-Proven Setup That Saves ScrapCNC wire benders deliver high accuracy and speed…Industry InsightsHow to Learn a 3D Wire Forming Machine: Beginner Path from Hardware to Solo ProgrammingA 3D wire forming machine (also called a 3D wire…Related news

Foshan Zhaoshi designs and builds CNC wire forming and resistance-welding equipment — from ring makers and 2D/3D benders to flange lines and turnkey cells. 5000㎡ Shunde workshop · 20+ years · engineer-led support.
Mobile/WhatsApp
Address
No. 5, Xiashi Section, Yangda Road, Xiashi Village, Lunjiao Sub-district, Shunde District, Foshan City, Guangdong Province, China
Mon–Sat 08:00–18:00 (GMT+8)
Follow Us
Copyright © 2026 Foshan Zhaoshi Precision Electromechanical Co., Ltd. All rights reserved.
business license