 Industry InsightsHow to Straighten Wire Fast on a CNC Wire Bender: Shop-Proven Setup That Saves ScrapCNC wire benders deliver high accuracy and speed…

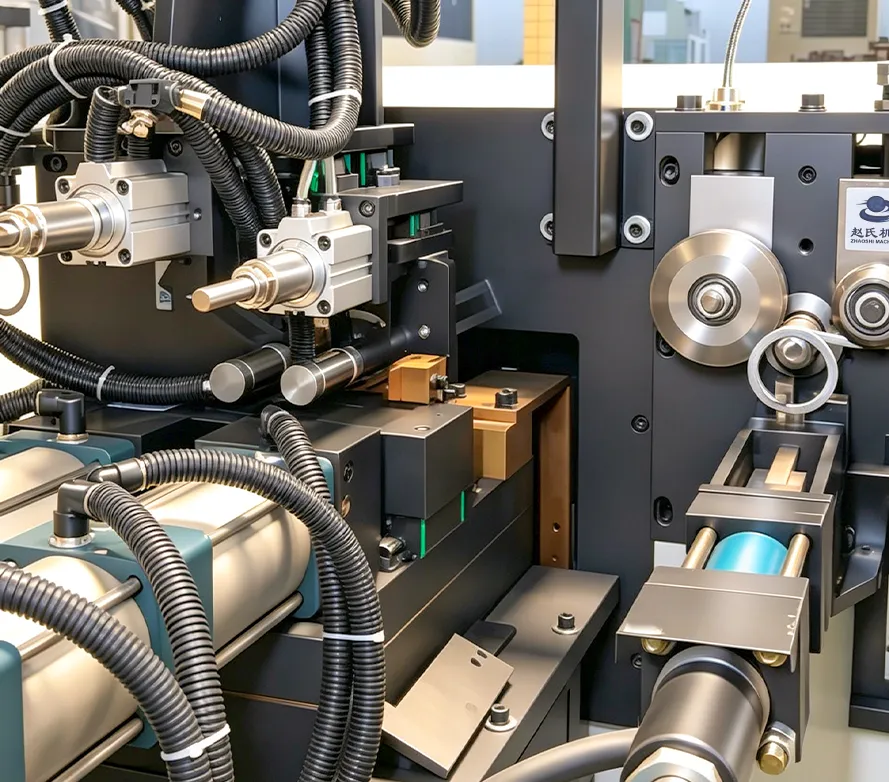
How to Set Diameter and Weld Quality on a Ring Making & Butt-Welding Combo Machine
Industry Insights
Author:
leaf
Time:
3 月 14, 2026
An integrated ring-making and resistance butt-welding machine combines forming and joining — a core cell in wire processing. On the floor, operators often hit two problems: diameter that will not stay on target, and unstable welds that either pull apart or overburn black. Diameter is a mechanical coordination problem; weld quality is an electrical-parameter matching problem. This article covers both in detail.

1. Diameter Adjustment: Forming Wheels and Cutter Must Work Together
Diameter control hinges on forming-wheel position and cutter position. Wheels decide how much the wire bends; the cutter decides when it is cut. When both are right, diameter lands accurately.
Step 1: Set forming wheels to lock the arc
Find the forming adjuster on the top or side (some machines have several). Turning the handle moves the forming wheel fore/aft and changes bend sharpness:
– Smaller diameter: move the forming wheel forward so the wire bends tighter – Larger diameter: back the wheel out for a gentler arc
Loosen lock nuts first, micro-adjust while watching the arc through the wheels, and do not fully lock until the cutter is also set.
Step 2: Set cutter position to lock cutoff timing
Cutter position decides how far the bend has progressed when cut. Set the hydraulic knife near the radius of the ring so the cutter axis passes through the circle center:
– Find the travel stop or limit switch – Loosen screws and slide the stop – Diameter too large: move the stop toward forming wheels (cut earlier) – Diameter too small: move the stop farther (cut later)
Jog a cut and confirm the knife severs at the right place.
Step 3: Trial cut and iterate
After wheels and cutter are set, cut one ring and measure. Fine-tune by the error direction. Rule: arc first, cut second — never reverse that order.
On CNC models you may enter diameter on the HMI and let the system control feed and forming, but springback and tooling wear still need compensation values or a light handle tweak.
Step 4: Assist — straighten and flatness
If exit wire wanders in/out, increase straighten force on the guide plate. Adjust forming-wheel vertical in/out to improve flatness.
2. Weld Quality: Current, Pressure and Time as a Triangle
Butt-weld quality depends on matching weld current, weld time and electrode force, plus clamp, upset and hold times.
Step 1: Know controller parameters
Typical dedicated weld controllers (e.g. 33U style) include:
| Param | Name | Function | |——–|———-|———-| | 1 | Clamp time | Start to upset-valve output | | 2 | Upset time | Upset valve to weld-current start | | 3 | Weld current | Current value (constant current/voltage) | | 4 | Weld time | Current duration on the joint | | 5 | Hold time | Force held after current off | | 6 | Release time | Main valve close to upset valve close | | 7 | Off time | Interval between continuous welds |
Step 2: Tune parameters in order
1. Clamp force and clamp time first: electrode force must stop end slip. Too low → high contact resistance and splash; too high → heavy deformation. Clamp time is often several to tens of cycles (1 cycle = 0.02 s).
2. Then weld current and weld time: the two core knobs. Too hot → overburn/black/collapse; too cold → cold weld. Start low and raise until fusion is sound without splash.
3. Finally upset force and upset time: after current, forge the joint to consolidate metal and eject impurities. Too little → weak joint; too much → heavy upset deformation.
Step 3: Trial weld checks
– Visual: no deep dents, cracks or black overburn – Pull: joint should reach ~80% of parent strength or break in parent metal – Bend: bend 90° at the joint without cracking
Change one parameter at a time between trials so you can see what fixed it.
3. Special Cases
1. Small rings (<100 mm): closed loop traps heat — often need higher current or longer time, watching overburn.
2. Materials
– Mild steel: easiest, wide window – Medium/high carbon: short time, higher current; watch decarb and hardenability – Stainless: higher resistivity → lower current than mild steel, but enough upset – Galvanized: zinc vapor — raise electrode force and current modestly
3. Overlap length
For lap joints, keep about 2 mm (more on large parts). Too long looks bad; too short is weak.
4. Common Issues
| Issue | Likely cause | Fix | |——|———-|———-| | Diameter jumps | Feed slip, loose forming wheel | Check feed rollers, lock wheels | | Oval ring | Bad cutter timing / arc | Arc first, then cutter | | Weak weld | Low current/time/force | Raise current/time/force | | Black overburn | High current/time | Reduce current/time | | Heavy splash | Low force, dirty ends | Raise force, clean ends | | Misaligned joint | Clamp angle / wire wander | Adjust upper/lower clamps |
5. Overall Setup Flow
1. Mechanics first: feed, forming wheels, cutter → accurate diameter 2. Then electrical: weld parameters low→high trials 3. Fine-tune: tweak mechanics or weld from trial results 4. Record: save wheel positions and weld recipes per material
Summary
Ring–weld combo setup mixes feel on the mechanical side with experience on the electrical side. Diameter: arc then cut. Welding: current–time–force triangle. Change one variable per trial and the pattern becomes clear — accurate rings, solid joints, higher throughput.
Related articles
View allIndustry InsightsHow to Straighten Wire Fast on a CNC Wire Bender: Shop-Proven Setup That Saves ScrapCNC wire benders deliver high accuracy and speed…Industry InsightsHow to Learn a 3D Wire Forming Machine: Beginner Path from Hardware to Solo ProgrammingA 3D wire forming machine (also called a 3D wire…Industry InsightsCNC Servo Straightener Feed Length Off Spec? Mechanical-to-Electrical Troubleshooting GuideCNC servo straighteners are workhorse equipment …Related news

Foshan Zhaoshi designs and builds CNC wire forming and resistance-welding equipment — from ring makers and 2D/3D benders to flange lines and turnkey cells. 5000㎡ Shunde workshop · 20+ years · engineer-led support.
Mobile/WhatsApp
Address
No. 5, Xiashi Section, Yangda Road, Xiashi Village, Lunjiao Sub-district, Shunde District, Foshan City, Guangdong Province, China
Mon–Sat 08:00–18:00 (GMT+8)
Follow Us
Copyright © 2026 Foshan Zhaoshi Precision Electromechanical Co., Ltd. All rights reserved.
business license